You’re about to discover the simplicity of plant division, a low-maintenance propagation method that increases plant stock, improves plant health, and allows you to share plants with friends and family. By dividing herbaceous perennials, bulbs, rhizomes, and tubers, you’ll efficiently produce multiple plants and encourage healthy growth. Timing is essential, so learn the best division frequency for each species, considering factors like climate, soil quality, and plant maturity. Follow a step-by-step process, from preparing the plant to providing ideal growing conditions, and troubleshoot common issues. As you explore the world of plant division, you’ll uncover the secrets to successfully multiplying your favorite plants.
Key Takeaways
• Division is a low-maintenance propagation method that increases plant stock and improves plant health, particularly useful for perennials.
• Suitable plants for division include herbaceous perennials, bulbous plants, rhizomatous plants, tuberous plants, and offset-producing plants.
• Timing and frequency of division vary for different plant species, with dormancy division being vital for bulbs and rhizomes.
• Climate, soil quality, and plant maturity influence division, with specific climate conditions and well-draining, nutrient-rich soil being essential.
• By following a step-by-step division process and providing optimal growing conditions, plants can thrive and new plants can be successfully propagated.
Table of Contents
Introduction to Plant Propagation by Division

As you explore plant division, you’ll discover the principles and benefits of this propagation method. You’ll learn how to separate a parent plant into multiple sections, each capable of growing independently, and understand the advantages and limitations of this technique. By grasping these fundamental concepts, you’ll be well on your way to successfully propagating plants using division.
Understanding the Principles and Benefits of Division
You’ll find that division, a low-maintenance and effective method of plant propagation, offers several benefits, including increased plant stock and improved plant health. When dividing plants, you’re fundamentally creating new plants from existing ones, which can lead to a significant increase in your plant collection. This method is particularly useful for perennials, which can become congested over time. By dividing and replanting, you’re giving your plants a fresh start, reducing the risk of disease and pests. Perennial propagation through division also allows you to share plants with friends and family, or trade them with other gardeners. By understanding the principles of plant division, you’ll be able to multiply your favorite plants with ease, creating a thriving garden that’s full of life and color. As you’ll soon discover, dividing plants is a simple yet powerful technique that can take your gardening skills to the next level.
Advantages and Limitations of the Division Method
By mastering the division method, you can harness its full potential, but it’s equally important to acknowledge its limitations to guarantee successful propagation. On the plus side, dividing bulbs and rhizomes allows you to produce multiple plants quickly and efficiently, making it an excellent way to share plants with friends or expand your own garden. Dividing plants also encourages healthy growth, as it removes any weak or diseased sections, leaving you with vigorous, thriving plants. Moreover, plant division is a low-cost and low-tech method, making it accessible to gardeners of all levels.
However, there are some limitations to be aware of. Not all plants can be divided, and some may require special care during the process. Additionally, dividing plants can be stressful for them, so it’s essential to choose the right time and conditions for division. By understanding the advantages and limitations of the division method, you’ll be better equipped to use this powerful tool for successful plant propagation.
Suitable Plants for Division
As you explore the world of plant division, you’ll find that certain plants are more suitable for this propagation method than others. You’ll be happy to know that many popular garden plants can be easily divided and shared with friends or replanted in your own garden. By understanding which plants respond well to division, you’ll be able to multiply your favorite varieties with confidence.
- Herbaceous perennials like ornamental grasses, hostas, and daylilies
- Bulbous plants such as lilies, daffodils, and tulips
- Rhizomatous plants like irises, cannas, and ginger
- Tuberous plants including dahlias, sweet potatoes, and potatoes
- Offset-producing plants like bromeliads, spider plants, and agave
Herbaceous Perennials: Ornamental Grasses, Hostas, and More
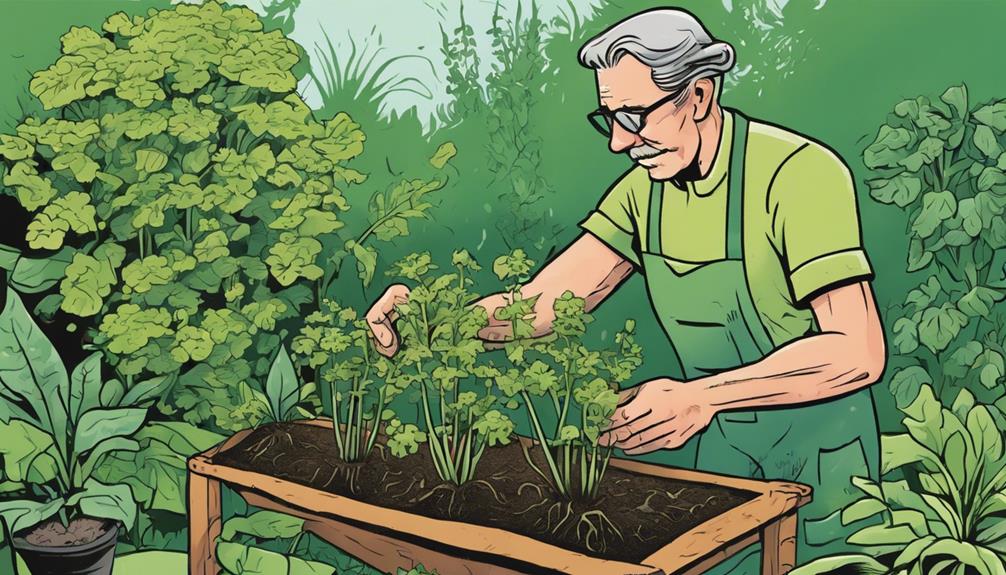
Dividing herbaceous perennials, such as ornamental grasses and hostas, offers an excellent opportunity to rejuvenate overgrown plants and share them with friends or expand your garden. You’ll be amazed at how easily you can multiply these beautiful plants. When dividing herbaceous perennials, look for signs of overcrowding, such as decreased flowering or foliage. This is usually a signal that the plant needs to be divided. You can divide these plants in the spring or fall, when the plant is dormant. Start by digging up the entire clump, gently washing away the soil to expose the roots. Then, identify the natural divisions, such as dividing tubers or offsets, and separate them using a sharp, clean tool. Make sure each section has at least one “eye” or growing point. Replant the new divisions immediately, watering well to settle the soil. With a little care, you’ll be enjoying your newly divided herbaceous perennials in no time. By dividing and replanting, you’ll be rewarded with healthy, thriving plants that will bring joy to your garden for years to come.
Bulbous Plants: Lilies, Daffodils, and Others
You’ll want to divide bulbous plants like lilies and daffodils when the foliage has died back, typically in the summer or early fall, as this allows the bulbs to recharge for next year’s bloom. This is an important step in gardening, as it guarantees healthy growth and maximizes flower production. When dividing, gently dig around the bulbs, taking care not to damage them. Use a fork to loosen the soil, then carefully lift the bulbs out of the ground. Separate the bulbs, making sure each section has at least one ‘eye’ or growing point. Replant the sections immediately, providing enough space for growth. Water well and keep the soil moist. By dividing your bulbous plants, you’ll be able to share them with friends or expand your own garden, enjoying the beauty of these horticultural wonders. With proper care, your newly divided bulbs will thrive, providing years of enjoyment in your garden. This simple yet effective method of bulb propagation is a valuable skill in the world of gardening and horticulture.
Rhizomatous and Tuberous Plants: Irises, Dahlias, and More
What makes rhizomatous and tuberous plants, like irises and dahlias, ideal candidates for division is their unique growth habit, which allows them to produce new shoots and roots from their underground stems. This characteristic enables you to separate and replant sections of the plant, giving you multiple new plants. When dividing rhizomatous plants, you’ll typically find that the rhizome (a modified underground stem) has produced new shoots and roots. Simply separate these sections, making sure each division has at least one ‘eye’ or growing point, and replant them. For tuberous plants like dahlias, you’ll need to carefully dig up the entire plant, then separate the tubers, making sure each section has at least one ‘eye’ each. Replant the divisions in well-draining soil, and water thoroughly. With a little care, your new plants will thrive. Remember to divide your plants during their dormant season, usually in the fall or early spring, to minimize stress and ensure successful propagation.
Timing and Frequency of Division

Now that you’ve identified the suitable plants for division, it’s crucial to think about the timing and frequency of this process. You’ll need to determine whether to divide your plants during dormancy or active growth, as this choice can greatly impact the success of the propagation. By understanding the best division frequency for each species and the factors that influence division timing, you’ll be well on your way to successfully multiplying your plants.
Dividing Plants During Dormancy or Active Growth
When dividing plants, timing is essential, as it directly affects the success of the propagation process, and doing it during dormancy or active growth can make all the difference. You’re probably wondering which one is best for your plants. Generally, dividing during dormancy is vital for plants like bulbs and rhizomes, as it allows them to focus energy on re-establishing themselves. This usually occurs during the fall or early spring when the plant is not actively growing. On the other hand, actively growing plants can be divided during the spring or summer when they’re producing new growth. This method works well for plants like perennials and tubers. Regardless of when you divide, make sure the plant is healthy and has enough energy reserves to support new growth. It’s also important to handle the roots with care, as excessive disturbance can cause stress to the plant. By considering the timing of division, you’ll be well on your way to successfully propagating your plants and enjoying their beauty for years to come.
Determining the Optimal Division Frequency for Each Species
You’ll need to take into account the unique characteristics of each plant species to determine the best division frequency, as some plants may require more frequent division than others. Some plants, like bearded irises, need to be divided every 3-4 years to maintain their vigor, while others, like daylilies, can go 5-6 years between divisions. Consider the plant’s growth rate, flowering frequency, and overall health when deciding how often to divide. Faster-growing plants typically require more frequent division, while slower-growing ones can go longer between divisions. Additionally, observe your plants’ responses to division and adjust your frequency accordingly. If you notice a decrease in plant performance or an increase in disease susceptibility, it may be a sign that division is needed more frequently. By understanding the specific needs of each species, you’ll be able to strike the perfect balance and promote the health and prosperity of your divided plants.
Factors Influencing Division Timing and Success
Several factors, including climate, soil quality, and plant maturity, greatly influence the timing and success of division, and understanding these factors is essential for achieving ideal results. You’ll want to take into account the climate, as some plants thrive in certain conditions, while others struggle. For example, plants that thrive in cooler temperatures might be divided in the fall or early spring, while those that prefer warmer temperatures might be divided in the late spring or early summer.
Soil quality also plays a significant role, as plants growing in poor soil may not be suitable for division. You’ll want to make sure the soil is well-draining and rich in nutrients before dividing your plants. Plant maturity is also important, as dividing immature plants can lead to weak and stressed offspring. You’ll want to wait until your plants have reached maturity, usually indicated by their ability to produce flowers or seeds.
Step-by-Step Division Process
You’re now ready to start the division process, and it’s crucial to follow the right steps to guarantee the best results. You’ll begin by preparing the plant and division site, then move on to digging and lifting the parent plant, separating the divisions, and finally, planting and caring for the new plants. By following these steps, you’ll be able to successfully divide your plants and enjoy the rewards of this simple propagation method.
| Step | Description |
|---|---|
| Prepare the Plant and Division Site | Clear the area, water the soil, and choose the right tools |
| Dig and Lift the Parent Plant | Carefully dig around the plant, then lift it out of the ground |
| Separate the Divisions | Use the right techniques and tools to separate the plant sections |
| Plant and Care for the Divided Plants | Replant the new divisions, water well, and provide proper care |
Preparing the Plant and Division Site
Before dividing your plant, prepare the parent plant and division site by watering the soil gently but thoroughly a day or two before division to make the soil easier to work with. This will help loosen the soil and reduce the risk of damaging the roots during the division process. Next, clear the division site of any debris or obstructions, giving you a clean and safe space to work. Remove any dead or dying plant material from the parent plant, as this will help prevent the spread of disease and encourage healthy growth. Take a few moments to inspect the plant’s roots, looking for any signs of rot, damage, or pests. If you find any issues, take care of them now to prevent them from affecting the new divisions. With your plant and division site prepared, you’re now ready to move on to the next step in the division process.
Digging and Lifting the Parent Plant
With your prepared plant and division site, you’re ready to carefully dig around the parent plant, gently loosening the soil about 6-8 inches from the base to avoid damaging the roots. This will give you enough room to work around the underground structures without causing harm. Use a fork or spade to loosen the soil, working your way around the plant in a circular motion. Be gentle, as you don’t want to damage the roots or disturb the surrounding soil.
As you loosen the soil, you’ll start to see the roots and underground structures of the plant. Take your time, and work slowly to avoid damaging any of the plant’s essential parts. Once you’ve loosened the soil, use a gentle rocking motion to lift the plant out of the ground. You may need to use a bit of force, but be careful not to pull too hard, as you don’t want to break any roots. With the plant lifted, you’ll have a clear view of the roots and underground structures, making it easier to divide the plant into sections.
Separating the Divisions: Techniques and Tools
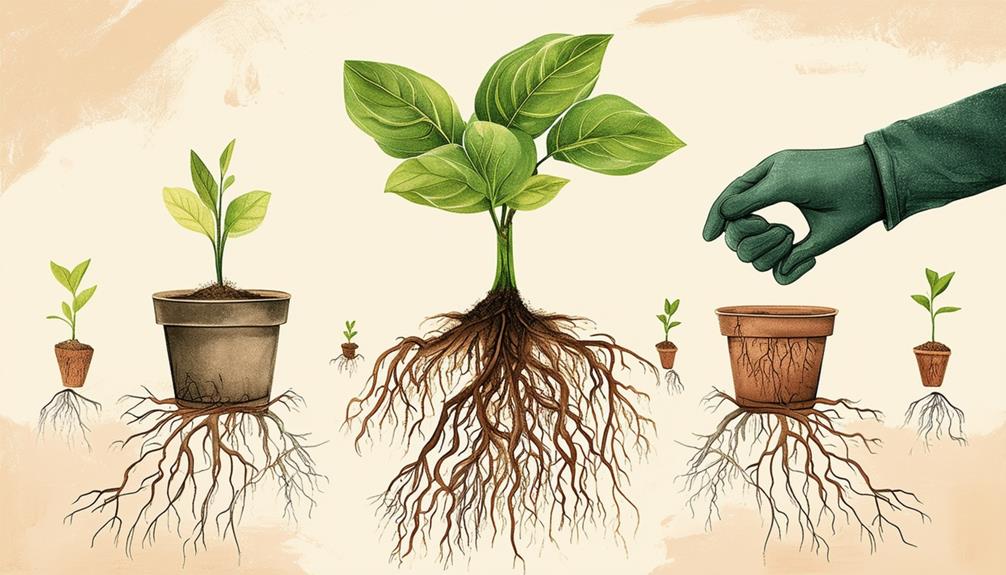
Now that the parent plant is lifted, gently examine the exposed roots and underground structures to identify natural separation points or weak areas where the plant can be divided. Look for areas with reduced growth or where the roots are less dense. You may need to gently wash away some of the soil to get a better view.
Using a sharp, clean tool like a garden fork, pruning saw, or sharp knife, carefully separate the divisions. Make clean cuts, and avoid tearing or ripping the roots, as this can cause damage to the plant. You may need to wiggle the tool back and forth gently to loosen the roots. If you encounter any stubborn connections, you can use a gentle twisting motion to separate them.
Keep in mind that different plants have different requirements, so be sure to research the specific needs of your plant. Some plants, like rhizomes, may need to be separated into sections with at least one “eye” each, while others, like bulbs, may need to be separated into individual units. Remember to handle the divisions with care, as they’ll be sensitive until they’re replanted.
Planting and Caring for the Divided Plants
You’ll need to replant the separated divisions as soon as possible to minimize stress and prevent drying out. Prepare the planting area by loosening the soil to a depth of about 12 inches. If your plant requires specific soil conditions, such as acidic or alkaline, make the necessary adjustments. Plant the divisions at the same depth as they were previously, and space them according to their mature size. Water thoroughly to settle the soil and provide enough moisture to support establishment. Mulch around the plants to retain moisture and suppress weeds.
As you care for the newly planted divisions, make sure they receive adequate water, especially during the first growing season. Fertilize lightly, as excessive nutrients can cause more harm than good. Prune or trim the plants as needed to maintain their shape and promote healthy growth. Keep an eye out for pests and diseases, addressing any issues promptly to prevent the spread. With proper care, your divided plants will thrive, providing you with an abundance of new growth and freedom to enjoy the fruits of your labor.
Aftercare and Establishment

Now that you’ve successfully divided your plants, it’s essential to provide the right environment for them to thrive. You’ll need to focus on creating ideal growing conditions, watering, fertilizing, and mulching the newly divided plants to make sure they establish themselves strongly. By following these important steps, you’ll be well on your way to helping your divided plants flourish and grow into healthy, thriving specimens.
Providing Optimal Growing Conditions
As you diligently settle each divided section into its new home, make sure the soil is consistently moist but not waterlogged, enabling the roots to establish a strong foothold. You want to provide ideal growing conditions for your newly divided plants to thrive. Guarantee the soil drains well and has a pH level suitable for your plant species. If necessary, add organic matter like compost or well-rotted manure to improve soil structure and fertility.
Provide adequate light, but not direct sunlight, which can cause stress to the newly divided plants. Maintain a comfortable temperature range suitable for your plant species. For most perennials, daytime temperatures between 65°F to 75°F (18°C to 24°C) and nighttime temperatures around 55°F (13°C) are best.
Keep an eye on your plants’ progress, and be patient. It may take a few weeks for them to adjust to their new environment. With proper care and attention, your newly divided plants will establish themselves and start growing vigorously, giving you a sense of accomplishment and freedom in your gardening endeavors.
Watering, Fertilizing, and Mulching the Divided Plants
After settling the divided plants into their new homes, prioritize consistent moisture levels by watering them deeply once or twice a week, depending on weather conditions. Make sure the soil feels moist but not waterlogged, as this can lead to root rot. As you water, inspect the plants for any signs of stress or disease.
Next, fertilize your newly divided plants with a balanced, water-soluble fertilizer. This will provide them with the necessary nutrients for healthy growth. Follow the fertilizer package instructions for application rates and timing.
Monitoring Plant Health and Growth
Check in on your newly divided plants regularly to catch any potential issues before they become severe. You want to guarantee they’re adjusting well to their new surroundings and receiving the right amount of water, nutrients, and sunlight. Keep an eye out for signs of stress, such as wilting, discoloration, or pests. Make adjustments to their care accordingly.
Monitor the soil moisture, and water only when necessary. Fertilize sparingly, as divided plants may be more susceptible to burning. Mulch around the base to retain moisture and suppress weeds. Prune or deadhead as needed to promote healthy growth and encourage blooming.
As your plants establish themselves, you’ll notice new growth, such as leaves, stems, or flowers. This is a great sign that they’re thriving. Continue to monitor their progress, and make adjustments to their care as needed. With proper attention, your divided plants will flourish, and you’ll be rewarded with a stunning display of color and life.
Troubleshooting Common Issues and Challenges
You’ll likely encounter some common issues during the establishment phase, including overwatering, underwatering, and pest infestations. Keep an eye out for yellowing or droopy leaves, which can indicate too much or too little water. Adjust your watering schedule accordingly, and consider repotting if the soil is waterlogged or depleted. Inspect your plants regularly for signs of pests, such as whiteflies, spider mites, or aphids. Isolate infested plants, and treat them with insecticidal soap or neem oil according to the product’s instructions. Fungal diseases, like root rot or leaf spot, can also arise. Improve air circulation, remove affected areas, and treat with a fungicide if necessary. Be prepared to adapt your care routine based on your plant’s response. Monitor for signs of nutrient deficiencies, like stunted growth or discoloration, and adjust your fertilizer regimen as needed. By staying vigilant and addressing issues promptly, you’ll increase the chances of successful establishment and healthy growth.
Frequently Asked Questions
Can I Divide Plants in the Fall, or Only in the Spring?
You’re wondering if you can divide plants only in the spring or also in the fall. The good news is you can do it in both seasons! In the fall, divide plants about 4-6 weeks before the first frost, allowing them to establish themselves before winter. In the spring, wait until the soil can be worked and the threat of frost has passed. Just make sure to choose a time when the plant is dormant, as this reduces stress and promotes healthy growth.
What Tools Are Necessary for a Successful Plant Division?
You’ll need a few essential tools to successfully divide your plants. First, grab a sharp, clean knife or pruning saw to cut through roots and stems. A garden fork or spade will help gently dig up the plant, while a trowel or small shovel will come in handy for replanting. Additionally, have some twine or plant ties ready to secure any stems or roots. Don’t forget gloves and a kneeling pad for comfort and protection.
How Do I Store Divided Plants Until I Replant Them?
As you carefully cradle the newly divided plants in your hands, you envision them thriving in their new homes. Now, it’s essential to store them properly until replanting. Place the divided sections in a cool, shaded area with minimal light. Keep the soil consistently moist but not waterlogged. You can store them in paper bags, breathable containers, or even a tray with a clear plastic bag cover. This will help maintain humidity and prevent drying out.
Can I Divide Plants That Are in Poor Health or Diseased?
You’re wondering if you can divide plants that are in poor health or diseased? Generally, it’s best to avoid dividing sickly plants, as this can spread disease to healthy sections. However, if you must divide a struggling plant, make sure to disinfect your tools between cuts and remove any infected areas to minimize the risk of transmission. Healthy divisions will have a better chance of thriving, so prioritize their care.
Are There Any Plants That Should Never Be Divided?
Imagine trying to fix a broken puzzle by adding more broken pieces – it just won’t work. Similarly, you shouldn’t divide plants that are prone to spreading disease, like Japanese knotweed or horsetail. These invasive plants can outcompete native species and cause ecological harm. It’s best to avoid dividing them to prevent their further spread. Instead, focus on dividing healthy, well-behaved plants that will thrive and bring joy to your garden.
Conclusion
You’ve discovered the secret to multiplying your favorite plants, and now your garden is on the cusp of a transformation. Imagine a lush, vibrant landscape, teeming with life, versus a sparse, barren space, devoid of color. By mastering plant division, you’ve chosen the former, and a world of possibilities awaits. With each divided plant, you’ll watch your garden flourish, and your green thumb will flourish with it.
Back to our main Propagation guide.

